how to configure Nat(Network Address Translation ) in win 2003


Situation: I am an administrator of a small
company with 20 computers. I’m getting my
internet services through a DSL connection. I’m
using Microsoft
technologies; hence, my server is Windows
2003 Server. I want to distribute internet to
all the computers through the main server.
Solution: You can use Windows Routing and Remote Access tool for this situation. Follow the following steps to provide
internet facilities to every computer using your Windows 2003 Server.
1- Firstly, you will need two IP addresses, one for the DSL
modem interface and the other for the local LAN interface. Either you can
install two NICs (LAN Cards) or alternatively
you can assign two IP addresses to your
existing NIC. One IP address is for the LAN and the other is for connecting to the internet.
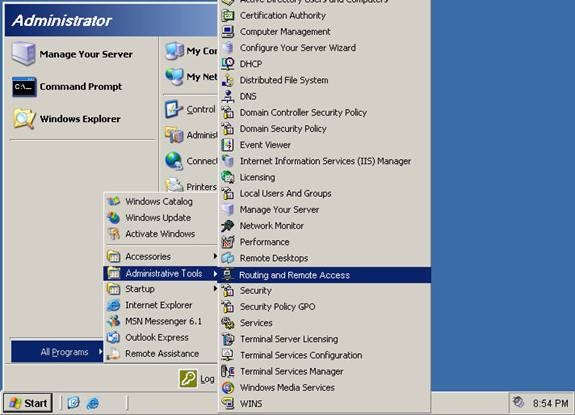
2- In your Windows 2003 Server, go to Start –> All Programs
–> Administrative Tools –> Routing and Remote Access

3- Right Click the server in the left hand pane and select
“Configure and Enable Routing and Remote Access”

4- Routing and Remote Access Wizard will appear, click Next.
5- Select Network Address
Translation (NAT) and then click Next.
6- Select the interface that connects you to the internet and
click Next.

7- Click Finish.
This will enable NAT on your server. Now configure the network
settings of your client computer and give the default gateway of your server
LAN interface. Or if you have setup a DHCP server in your network, configure
the DHCP server accordingly.
This is all that is required
No comments:
Post a Comment